Cakesicles are an easy to make and fun to decorate treat that are fast becoming a must-have for every dessert table. Basically a fun twist on the classic cake pop, they are a blend of frosting and cake mix encased in a shell of chocolate or candy melt coating.
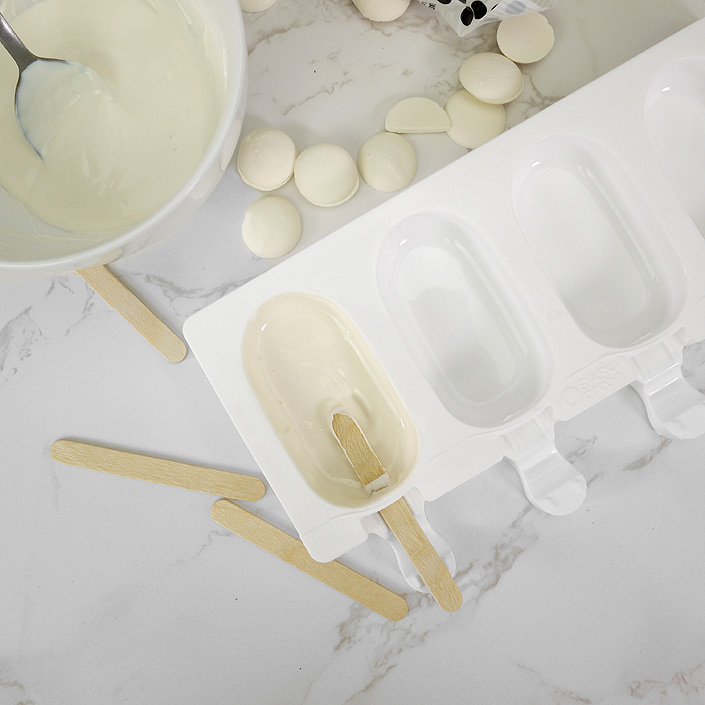
Place some candy melts in a suitable bowl and melt in the microwave in 20 second bursts, stirring in between, until they are completely melted. Use a teaspoon to spoon into the cakesicle mould and spread around, taking care to coat the whole surface.
Push a lolly stick at least a third of the way into the mould and brush a little of the melted candy melt around it. Wipe around the edge and leave to set in the fridge for 10 minutes or until firm.
.
Step 2. Creating The Filling
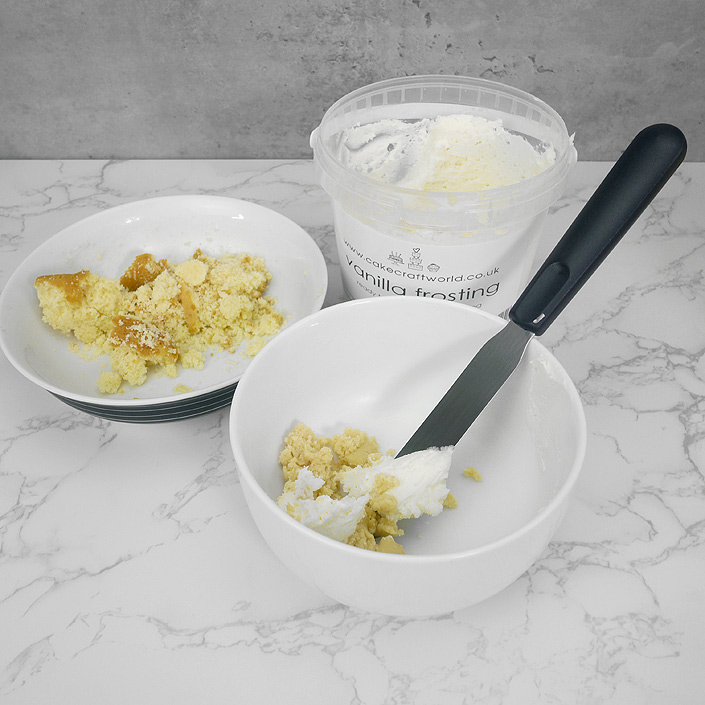
This is where you can get adventurous and create your own delicious fillings with different flavoured cake mixes and frostings. You can:-
use offcuts from a cake
make your favourite traybake or cake
bake different flavoured cupcakes
buy a shop-made sponge, Swiss roll or similar cake already filled with frosting
whatever you decide to use or bake, break the cake into crumbs in a bowl and mix in your chosen frosting until you have a blended mixture that is slightly sticky and will compress together.
Handy Tip It’s a good idea to freeze any offcuts so they are always available for cakesicles!
.
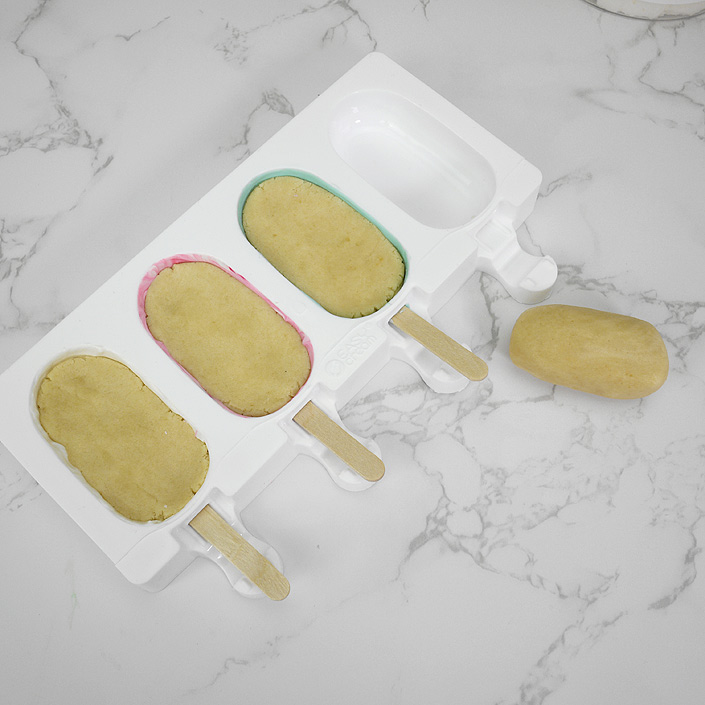
Step 3. Adding The Filling & Candy Top Coat
Mould the cake mixture into a sausage shape and press into the cakesicle mould, ensuring that it sits below the surface level. Re-melt the candy melts and spoon over the cake mixture in the mould until level with the brim. Tap gently to release any air bubbles and level the melted candy, then pop back in the fridge to set. Once firm, the cakesicles should easily pop out of the mould.
.
Step 4. Finishing Touches & Decorating Ideas
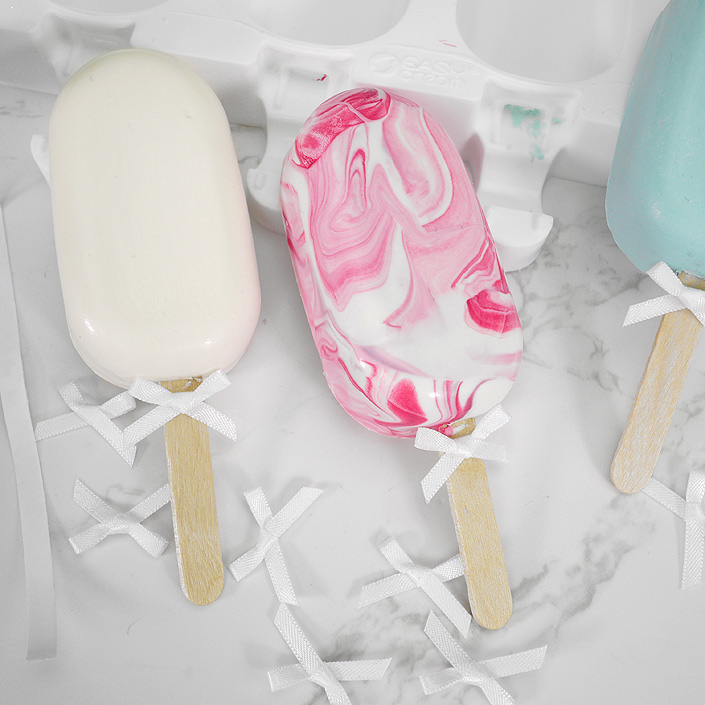
A tiny bow on the lolly stick is a lovely way to present your cakesicle. The easiest way to do this is to tie a small bow using 3mm satin ribbon, then attach it to the lolly stick with narrow double sided tape.
.
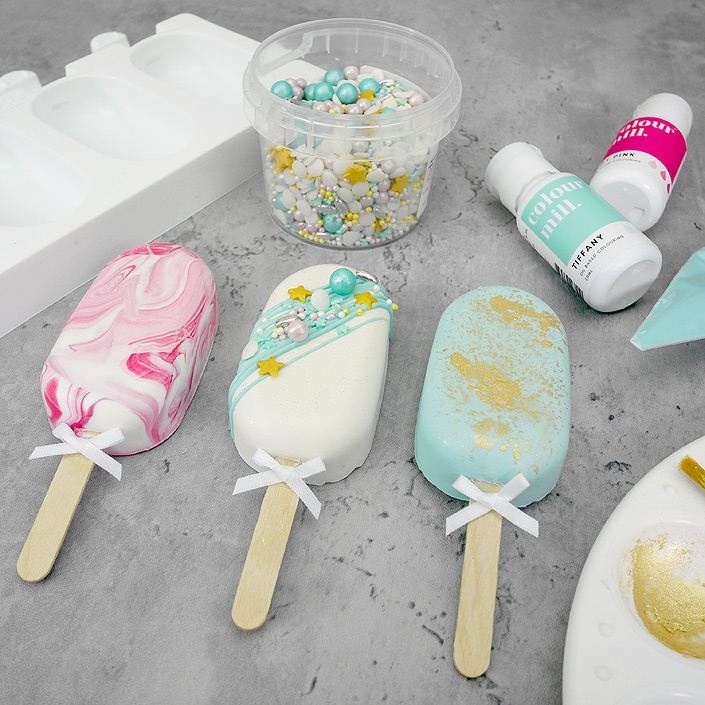
Have Fun With Colour!
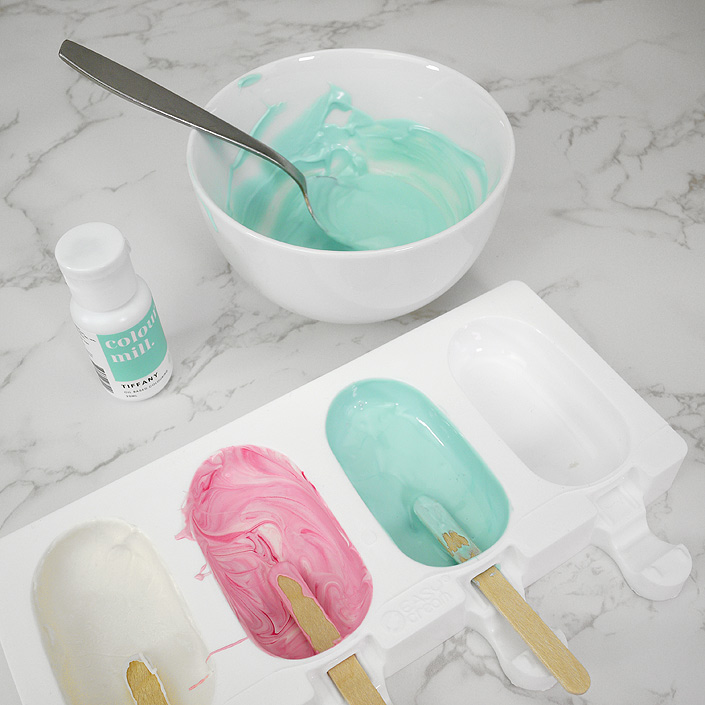
We use Colour Mill food colouring as this is specifically made for candy melts, chocolate and frostings, and it gives you a great range of vibrant colours and tones.
To add colour to the coating, add some Tiffany food colouring to white melted candy and stir well until the colouring is evenly distributed, then coat the mould as in Step 1 (alternatively, you can buy ready coloured candy melts).
Handy Tip It’s advisable to add food colouring a little at a time until you get the required shade – you can always add more!
.
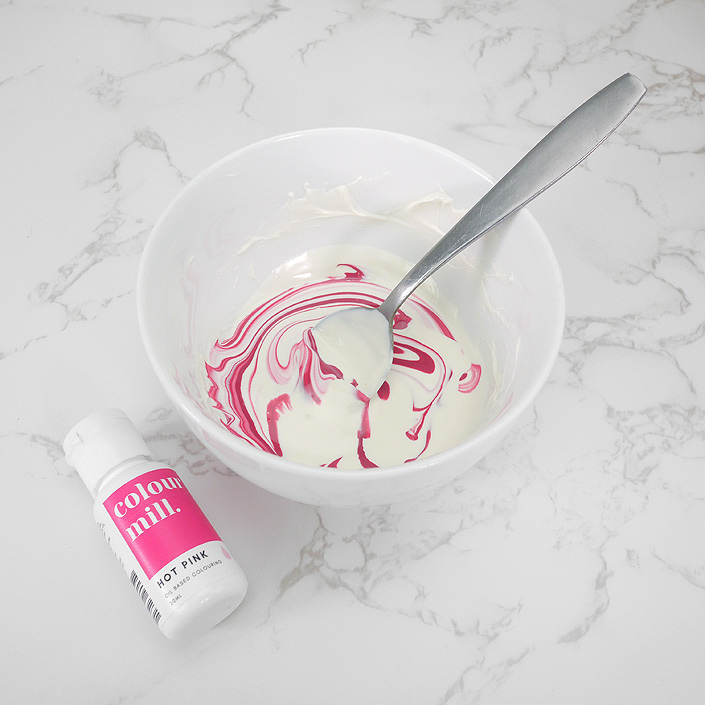
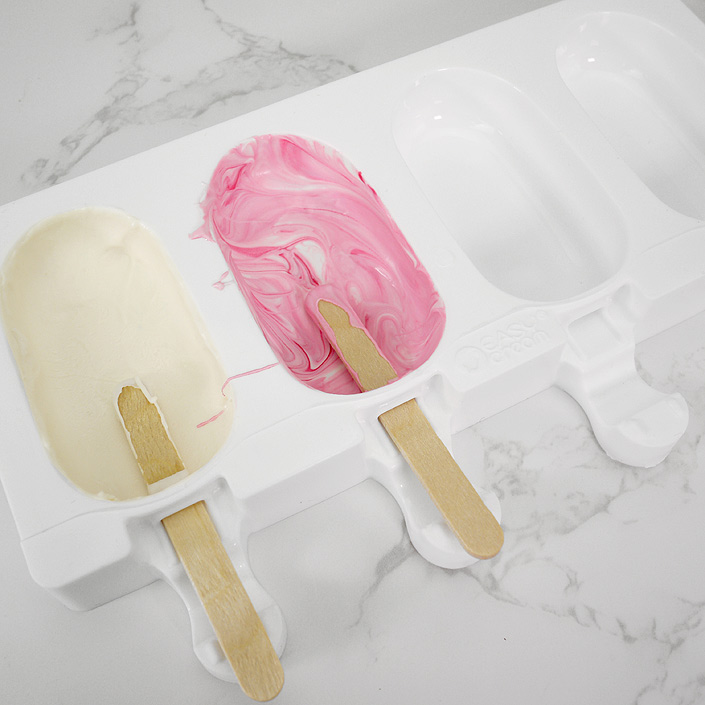
To achieve a raspberry ripple effect, add some Hot Pink food colouring into white melted candy and stir just a little to create a marbled effect.
Then carefully coat the mould as in Step 1, trying not to mix the colours together too much!
.
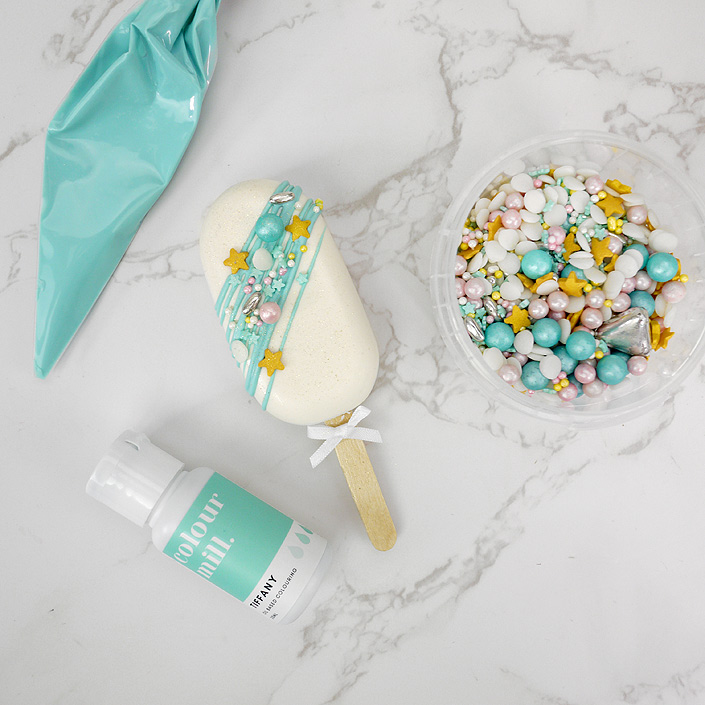
Drizzled Candy & Sprinkles
Colour some melted candy with Tiffany Colour Mill food colouring and pour into a disposable piping bag. Snip a tiny hole in the bottom of the bag and drizzle backwards and forwards over the cakesicle. Decorate with sprinkles before the candy starts to set and then return to the fridge until firm (we used Sattina Baby Blessings sprinkles).
Handy Tip Before snipping the end off your piping bag, push the melted candy down to the bottom of the bag and secure a Wilton piping bag tie above the candy. This will stop it oozing out!
.
A Decadent Touch
To add a splash of gold, mix Sugarflair Pure Gold lustre dust with a little rejuvenator spirit to create an edible paint. Carefully flick the gold paint onto the cakesicle and leave to dry.
.
Have fun creating these wonderful treats to match in with celebration cakes and themes and don’t forget, we love seeing what you have all been up to, so please don’t forget to share your cakes and bakes with us on social media.