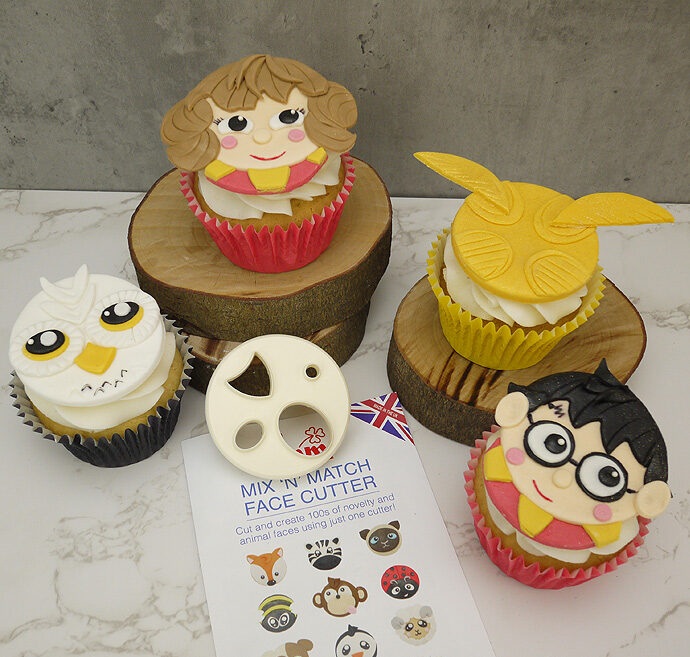
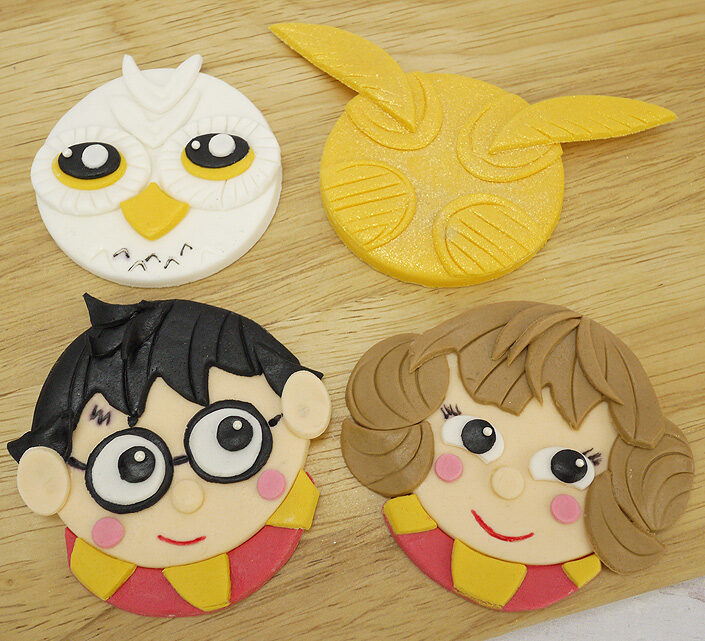
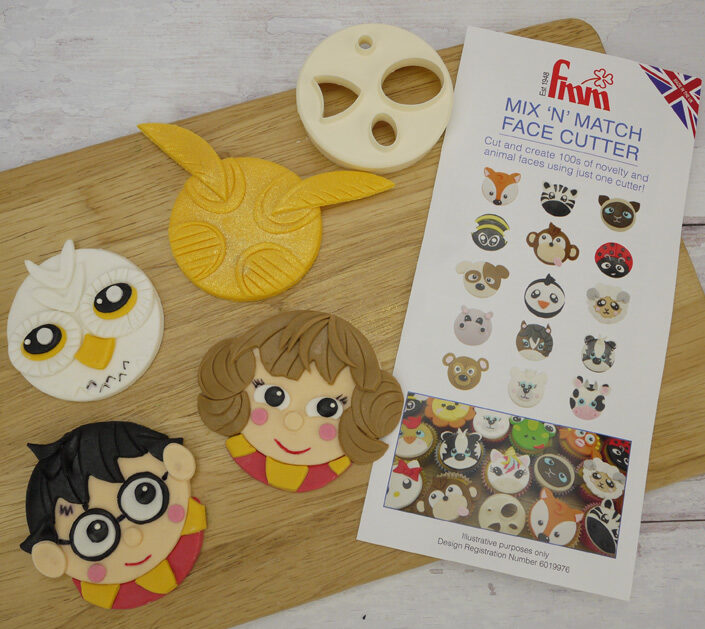
Inspired by World Book Day, it’s time to bring back one of our favourite cutters – the FMM mix ’n’ match face cutter. This time, the Cake Craft creative team have been busy creating characters from one of the best-selling books in history, selling over 500 million copies worldwide – Harry Potter.
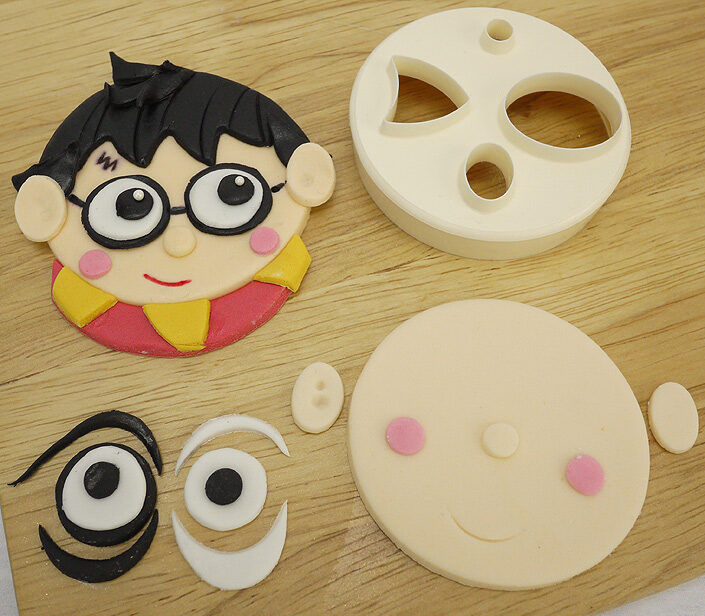
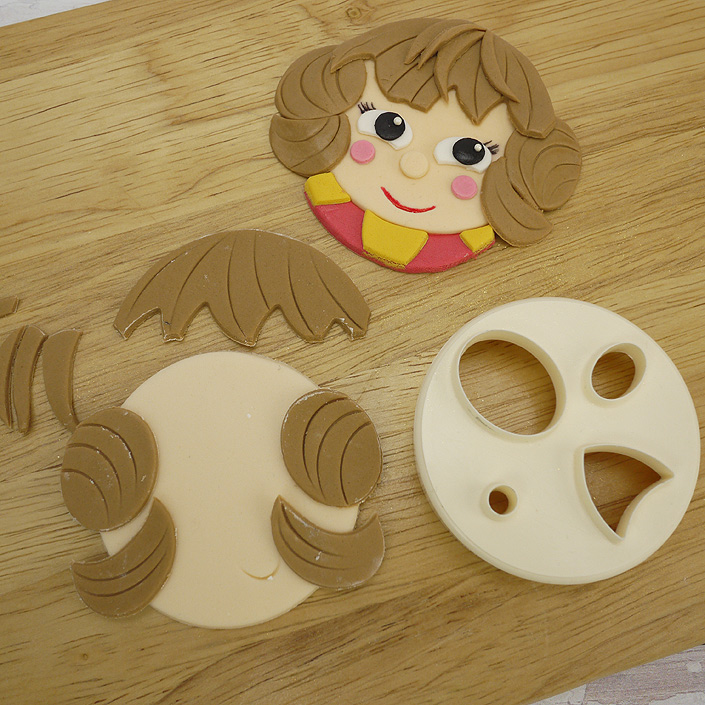
To make the face, colour some of the modelling icing flesh colour with a dot of orange food colouring. Knead well, then roll out to around 5mm in thickness on a dusting of icing sugar. Cut out the face with the round side of the cutter then roll the icing a little thinner and use the other side of the cutter to cut out a tiny round nose and two oval ears. For the two rosy cheeks, colour a little icing with a dot of red food colouring; as long as you don’t use too much, it will colour the icing pink! Roll out thinly and cut out two small circles, then pop them to one side ready to stick on the face a little later. Lastly, emboss a small mouth using the edge of the cutter.
Handy Tip Paste food colourings are stronger than liquid, so use a cocktail stick to add the colouring into your icing and knead thoroughly before adding more! Always pop excess icing back into an airtight bag so that it stays soft and can be re-used.
.
Eyes & Glasses
To make the round glasses and eyes, we actually used the large oval cutter and cleverly cut away to create different sized circles. Firstly, colour a small amount of icing black, roll out and cut out two large oval shapes. Use the oval cutter to carefully cut away both ends of the oval shape as shown so that you create two circles. Now roll out some white icing and repeat the same method creating two circles which can sit within the black glasses. Cut out two small black circles for the centre of the eyes and you are ready to assemble them, attaching with dabs of edible glue.
Hair, Scarf & Finishing Touches
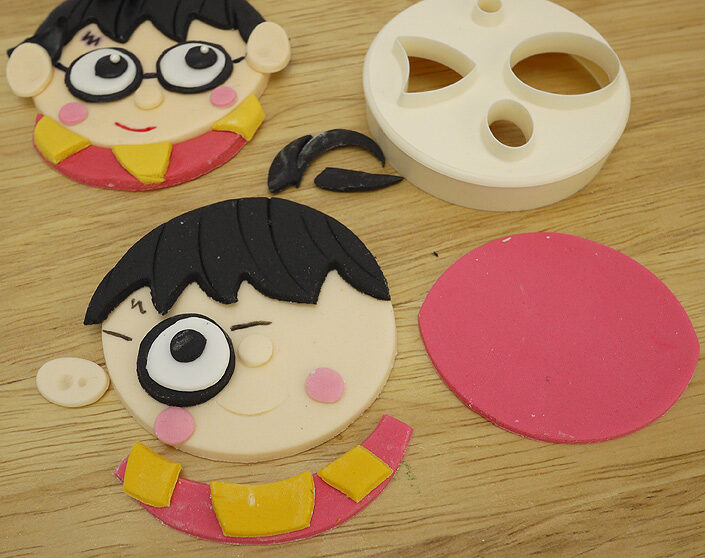
To create the hair, colour some icing black, roll out and cut out a large circle. Cut in half then use the triangular shape to create a zigzag fringe, mark some lines with the cutter then attach to the face with edible glue. Attach the eyes, ears, nose and cheeks then use a black edible ink pen to draw in the rest of the black glasses and his tiny zigzag scar to one side of the left eye. For the scarf, colour some icing with Christmas red and golden yellow, then use the cutter to shape the scarf to fit around the face; use the triangular cutter to create the yellow stripes. Attach with edible glue and draw on a mouth using a red edible ink pen following the outline.
Handy Tip If you do not have an edible ink pen, you can create an edible paint by adding a few drops of water to the paste food colouring. Just make sure you paint using a good quality fine paint brush.
.
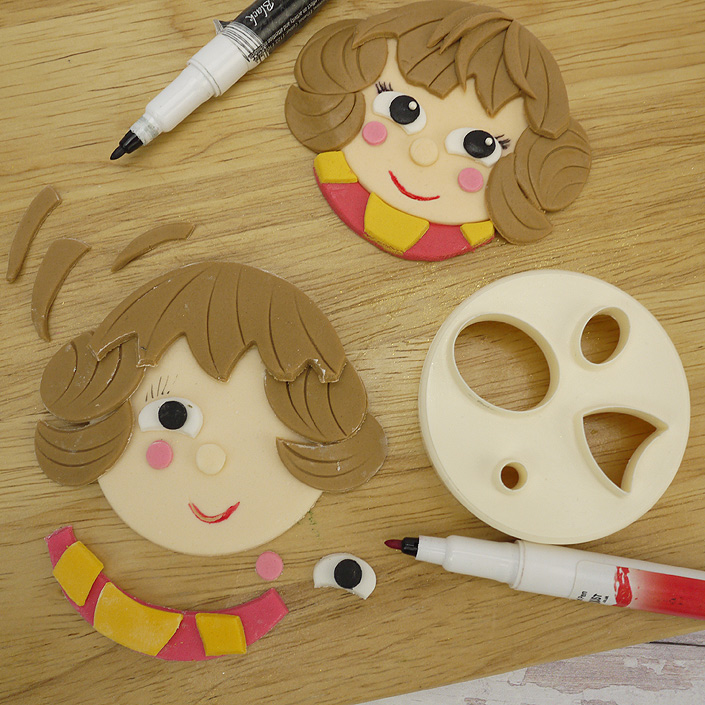
Step 2. Making ‘Hermione’.
This face is made using exactly the same method, you just need to be a little more creative when it comes to her hair. Use the large oval shape to create the curls either side of the face, marking them with the edge of the cutter and overlaying the icing.
To make two pretty eyes, use the oval cutter, shaping them at the bottom. Add small dots in the centre and draw on a few eyelashes with the black edible ink pen.
Handy Tip A cornflour pouch is a great little piece of equipment we could not do without. Filled with fine cornflour, you can dust your work surface to stop the icing sticking, it’s finer than icing sugar and works really well dusted on your hands too!
.
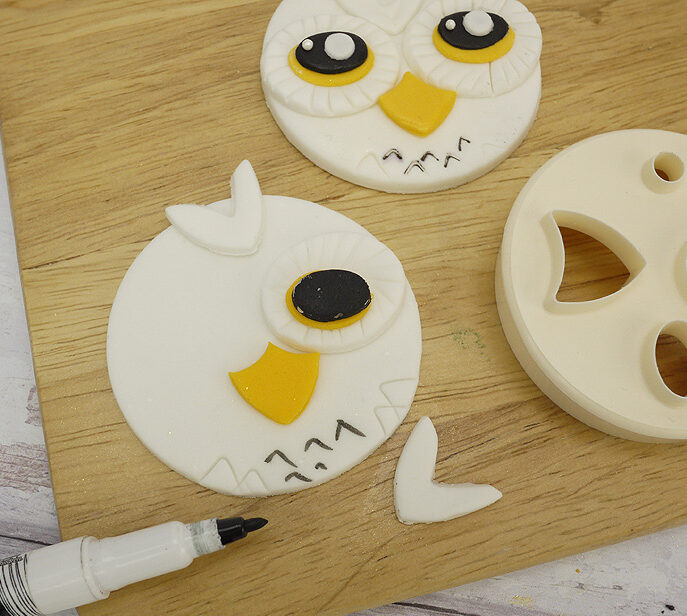
Step 3. Making ‘Hedwig’
Cut out a large white circle for the face and imprint some feather shapes along the bottom using the triangular cutter. Cut out two large oval shapes for the eyes then press into the centre using your thumb to indent and make slightly larger. Mark around the outside of each eye with a palette knife and attach to the face with edible glue. Now cut out two small ovals in yellow and make them slightly larger by pressing over with your thumb. Cut out two small oval shapes in black and two small circles in white before layering each part of the eye with edible glue. Highlight the eye with a tiny white dot of icing.
Beak & Feathers
Cut out a yellow triangular beak shaping the top as shown and two white top feathers, again using the triangular cutter to create the ‘V’ shape. Attach with edible glue and add a finishing touch to the feathers with an edible black pen.
.
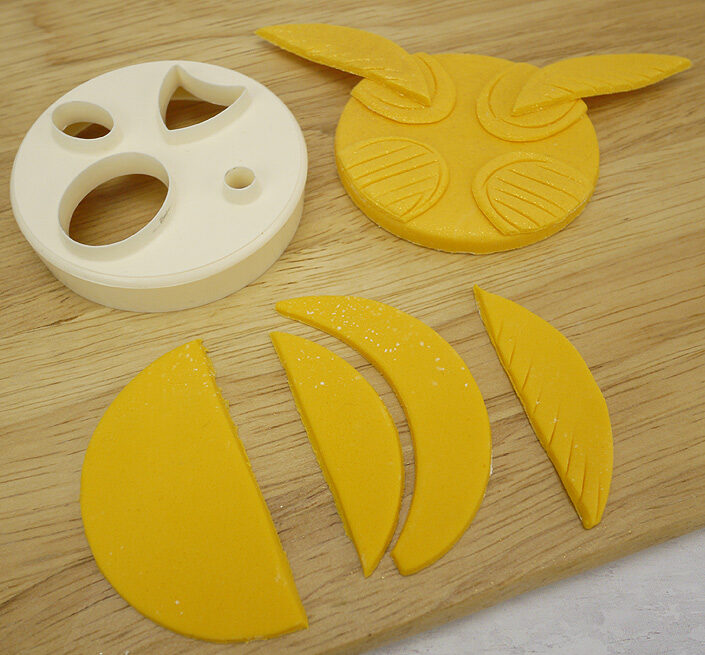
Step 4. Making ‘Golden Snitch’
Colour the icing yellow and cut out two large round circles and four large oval shapes. Use one of the circles for the base and the other one to create the two wings as shown, marking the edges with a palette knife. Now cut out four large oval shapes and trim using the round cutter to fit neatly within the topper. Mark each shape as shown then attach symmetrically with edible glue. To finish, attach the wings when set firm.
Handy Tip Due to the delicate nature of this topper, the wings should be cut out and made in advance giving them time to set firm. Allow at least 12 hours.
We love seeing what you have all been up to so please don’t forget to share your cakes and bakes with us on social media.