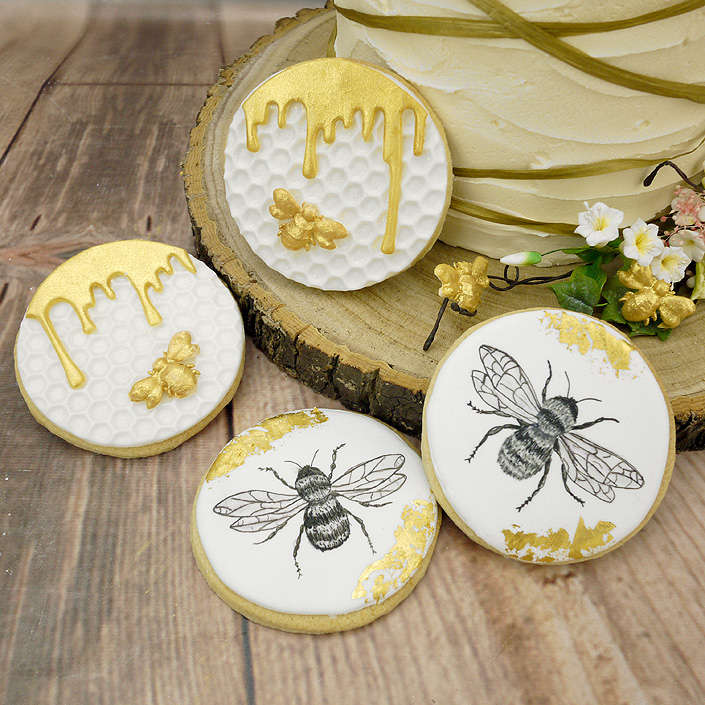
From delicately painted designs to sophisticated little golden bees on honeycomb, follow our two step by step projects to create your own unique ‘bee-autiful’ bee biscuits. We used the Sattina vanilla biscuit mix which makes approximately 16 round biscuits so we decorated some as painted bee biscuits and the others as golden bee biscuits.
.
Painted Bee Biscuits
You Will Need:
Edibles
Sattina vanilla biscuit mix
Sattina Ready To Use royal icing mix
Rainbow Dust Jet Black edible ink pen
Sugarflair Liquorice (black) paste colouring
Sugarflair Shadow Grey paste food colouring
1 sheet of edible gold leaf
Sattina white sugarpaste 250g
A sprinkling of flour
Petal Base (optional)
Equipment
Reversible circle cutter set, 88mm cutter
Wilton No. 2 piping tube
Wilton No. 3 piping tube
Wilton piping bags, pack of 12
Scriber tool
Parchment paper
.
Baking The Cookies

Follow the recipe on the Sattina vanilla biscuit mix, it’s super simple as you only need to add a little water and butter, knead and bake. You will need a sprinkling of flour on your worktop when rolling out the dough to prevent it sticking and don’t forget to grease your baking sheet with butter or even better, layer your baking tray with a sheet of greaseproof/parchment paper. The reversible cutter set comes in many different sizes, but we used the 88mm circular cutter.
Handy Tips
Use the butter at room temperature or if using straight from the fridge, you can grate it into the mixture.
Before rolling out the biscuit dough, pop it in an airtight bag in the fridge for 30 minutes. This will chill the dough and make it easier to handle when rolling out, cutting out and moving the biscuits onto a baking sheet.
.
Flooding The Biscuit With Run-Out Icing
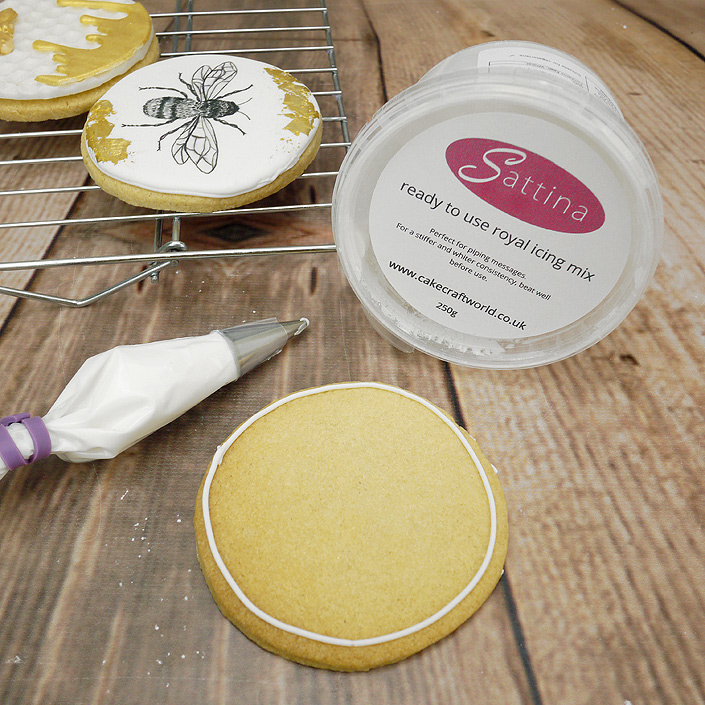
Run-out icing is made from royal icing and is simply a runny icing flooded into an area on the biscuit. It has to be kept in place before it sets, so to do this, pop a No. 2 piping tube into a disposable bag, fill with some royal icing and pipe a circle around the outer edge of the biscuits.
.
Handy Tips
Stir the icing well and to prevent any air pockets, spoon some of icing onto your work top. Use a flat palette knife to press the icing back and forth, pushing down hard on your worktop before spooning it into the piping bag ready to use. This will squash out any air bubbles and make piping the circle much smoother.
Practice makes perfect, so have a little practise on your work top first! Touch down, then apply pressure while piping the circle, then stop all pressure before you pull away.
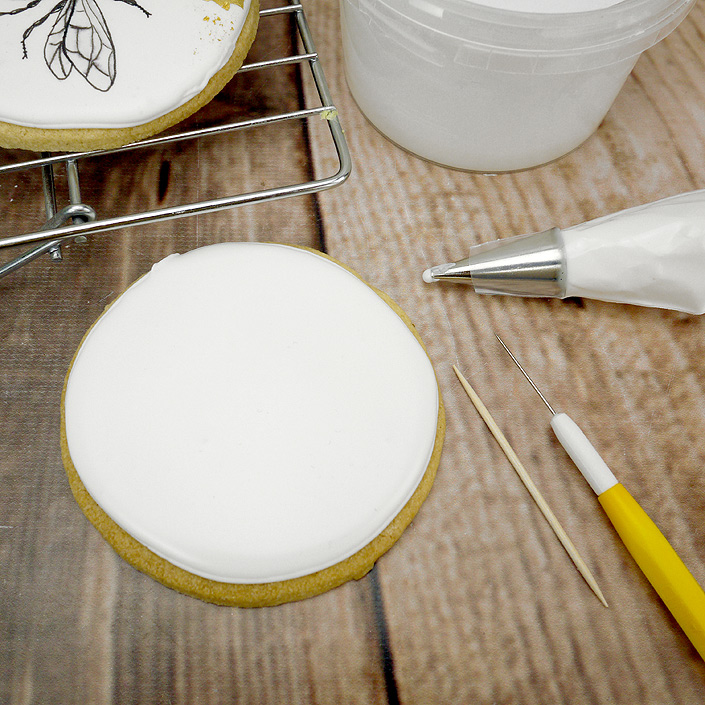
To fill in with runny icing you need to let the icing down – this means adding a little water to your royal icing to make it runny. It’s best to stir in drops of water a little at a time. To know you have the right consistency, stir the icing and count how long it takes to level out – you want it to be about 8 seconds. Pour the icing into an icing bag with a No. 3 tube and pipe onto the biscuit starting at the outside edge then moving into the middle. Give the biscuit a little wiggle to help level the icing out and leave overnight to set.
Handy Tip
Pierce any air bubbles with a cocktail stick or scriber while the icing is wet and freshly piped.
.
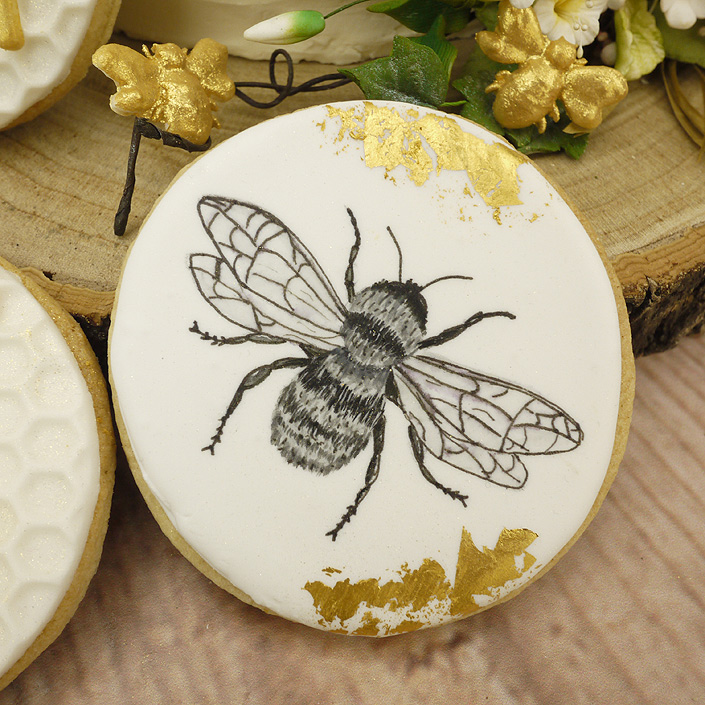
Drawing & Painting The Bee
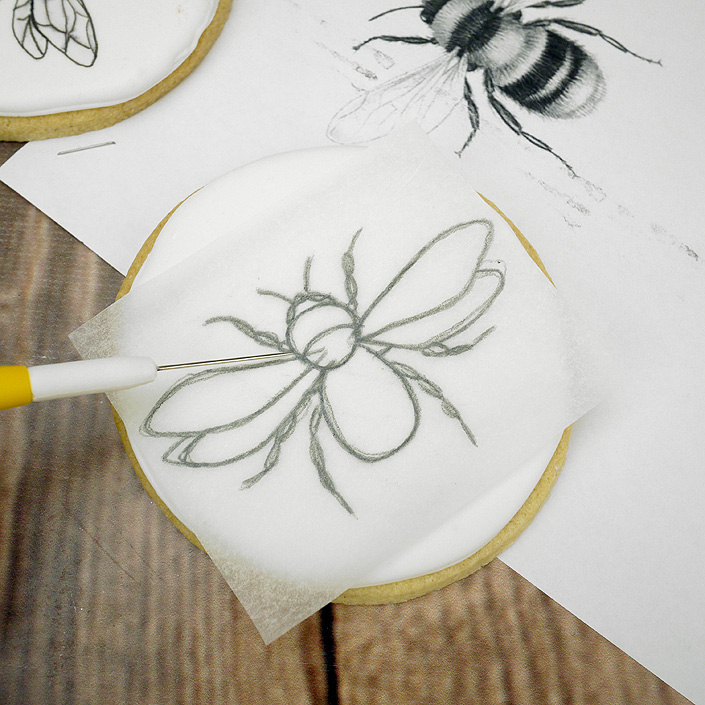
Choose some designs off the internet or from a book and trace onto some parchment paper. Position onto the biscuit, hold the paper in place with one hand and use a scriber tool to scribe the bee design onto the icing with the other. You have to press quite hard but the scriber will scrape through the parchment paper just enough to give you an outline on the icing to follow.
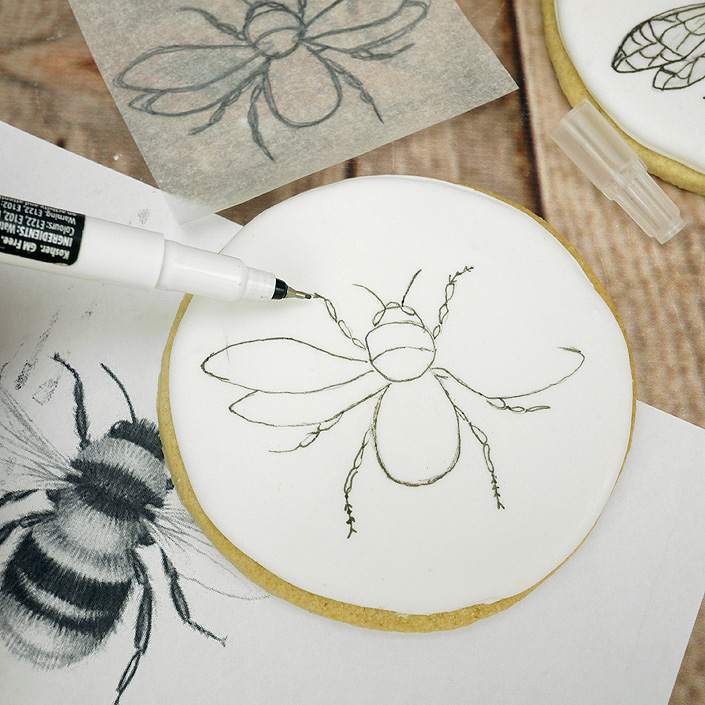
If you are really confident at drawing, you can practise on paper first before carefully drawing the bee image straight onto the icing with a black edible ink pen. We used the Rainbow Dust cake craft pen as it is double ended and has a really fine nib to create delicate detail.
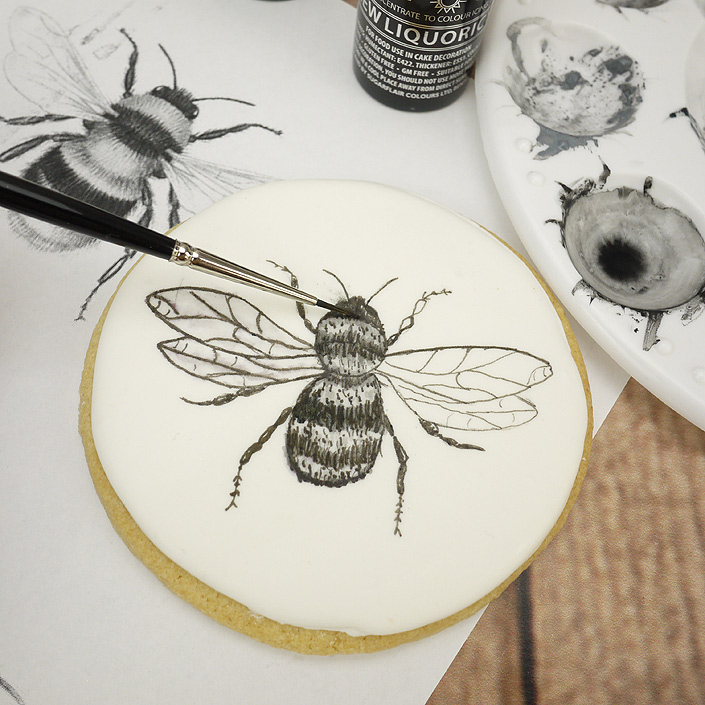
To paint the bee in shades of grey and black, we used Sugarflair black and grey paste food colouring. Put tiny amounts onto a plate or paint palette and add a few drops of rejuvenator spirit to create edible paints (you can use water but rejuvenator spirit dries quicker). Use a fine brush to carefully paint in the areas following the original image.
.
Adding Touches Of Gold Leaf
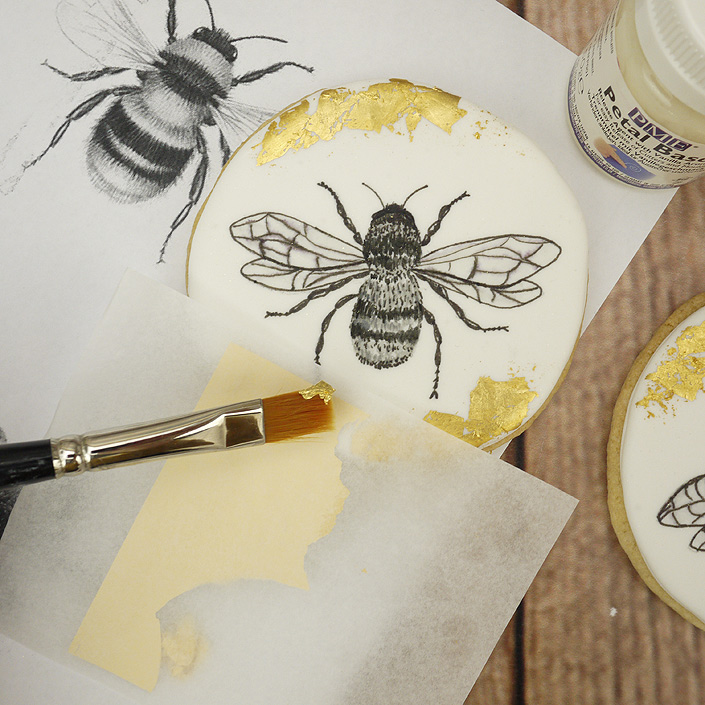
For a special touch, add a little gold leaf around the edge of each biscuit. The easiest way to do this is to brush a tiny amount of petal base onto the icing then place the gold leaf onto it and press very gently on the back of the brush. You can also use edible glue but petal base gives you more control.
.
Golden Bee & Honeycomb Biscuits
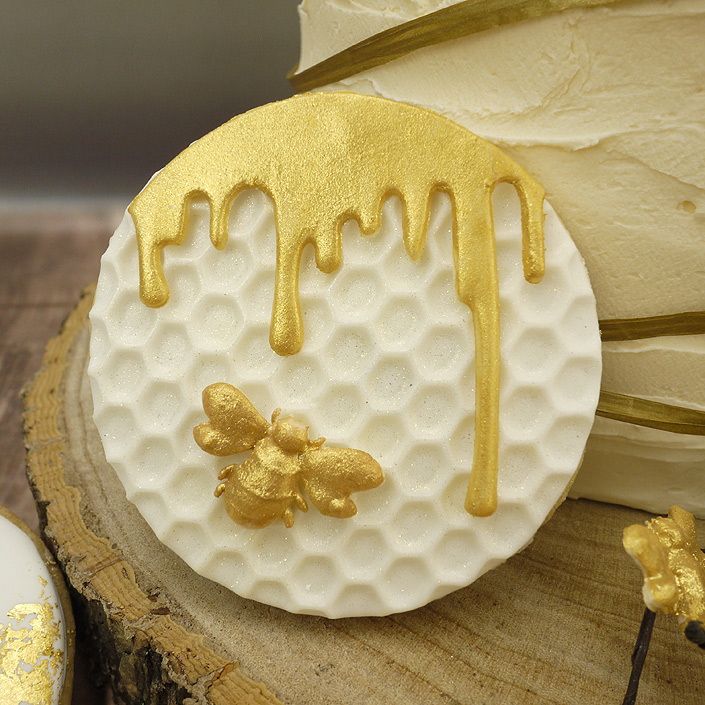
The instructions for making the vanilla biscuits are the same as above and in this part of the project, you will learn how to use an embossing sheet, make small bees using a mould and create a gorgeous gold effect.
To decorate, you will need:
Edibles
Sattina white sugarpaste 250g
Sugarflair Radiant Gold edible lustre dust
Sugarflair Powder Puff gold finishing sparkle
Rejuvenator spirit
Some jam
A sprinkling of icing sugar
Equipment
Reversible round cutter set, 88mm cutter
FMM Drip Cake inspired cutter
Honeycomb texture sheet
Small rolling pin
Palette knife
Medium sized brush
Karen Davies Butterfly & Insect Brooch mould
Cornflour pouch
.
Covering The Biscuits In Honeycomb & Drip Icing
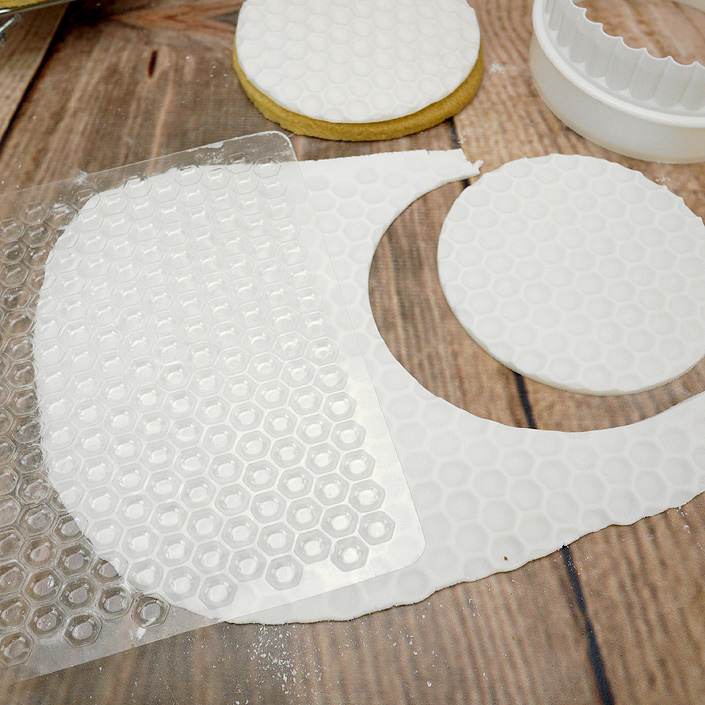
Roll out some white sugarpaste on a sprinkling of icing sugar to around 3-5mm then press the honeycomb embossing sheet over the top. Use the same size round cutter that you used to make the biscuits and cut out circular discs. To attach the honeycomb discs onto the biscuits use your favourite jam, but make sure it is seedless and only spread a light covering. Carefully lift the disc into place and press very gently to ensure you do not damage the honeycomb pattern.
Handy Tip
When spreading the jam onto the biscuits, leave a tiny gap around the outside edge to make sure it does not seep out when the icing is added.
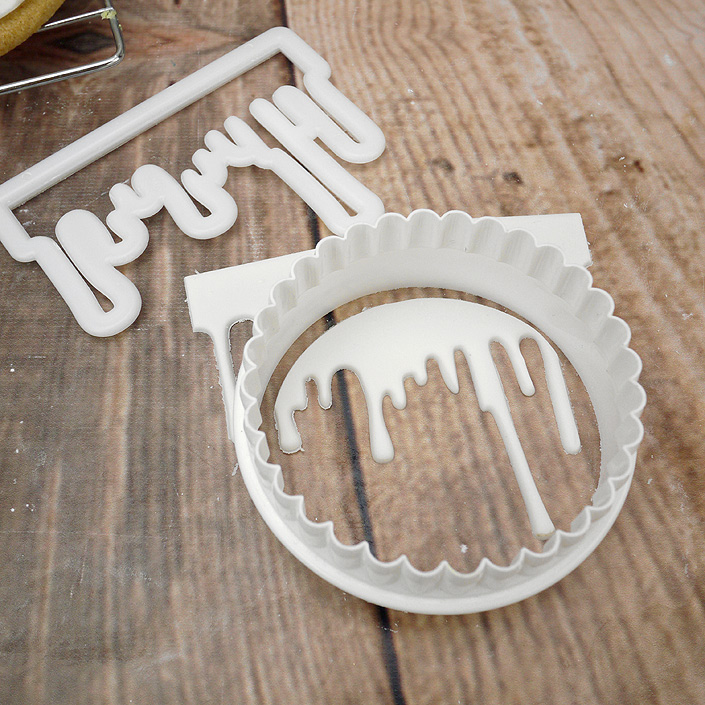
Roll out the white sugarpaste to around 3mm and cut out the drip effect shape with the FMM cutter. Place the round cutter over the top, position to get the best drip effect and cut out.
Handy Tip
Use a soft brush to push out any awkward shapes in the cutter.
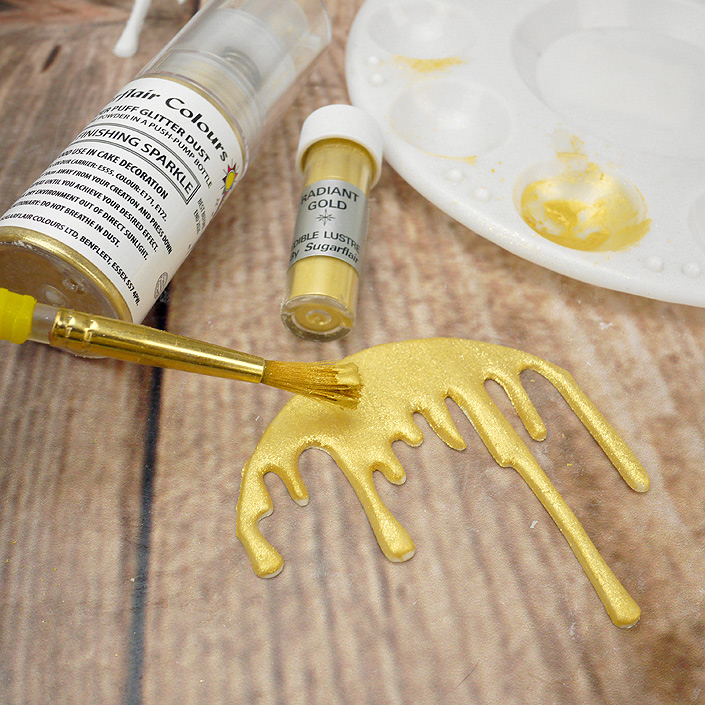
To paint the drip icing, pour some gold lustre dust onto a plate or paint palette and add a few drops of rejuvenator spirit. Mix together well to form an edible paint then brush over the cut out drip shape. Leave to dry for about 5 minutes then carefully lift onto the biscuit, attaching with a little water or edible glue.
.
Making The Bee
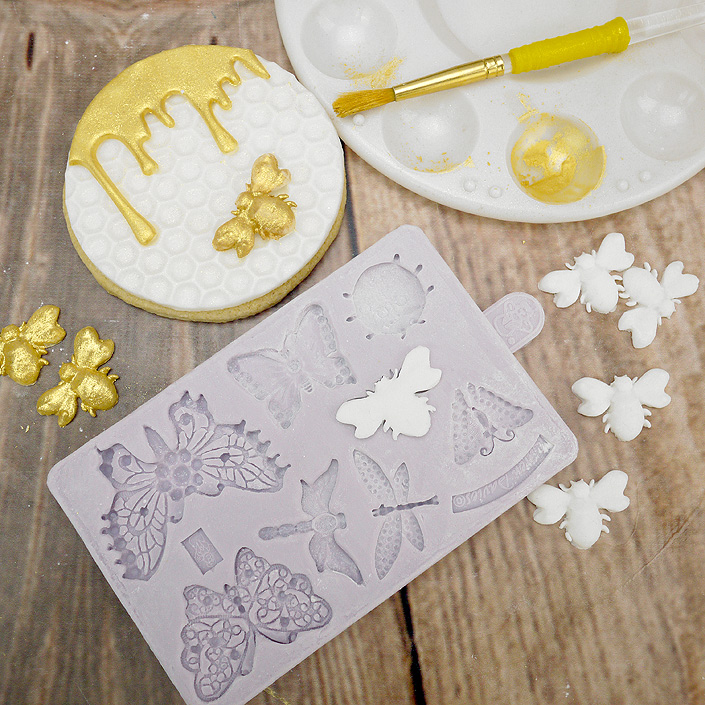
Dust the bee mould with a little cornflour then push a small ball of white icing into the mould. Press firmly so that the icing completely fills the mould then using a palette knife, cut across the top to cut away any excess icing. Turn the mould over to release the bee and paint gold before attaching to the cookie with edible glue.
.
We hope your kitchen will be a ‘hive of activity’ as you buzz around making your own bee-autifully decorated biscuits!
Happy Baking!
The Cake Craft Creative Team
Cake Craft World, our ideas, your creations