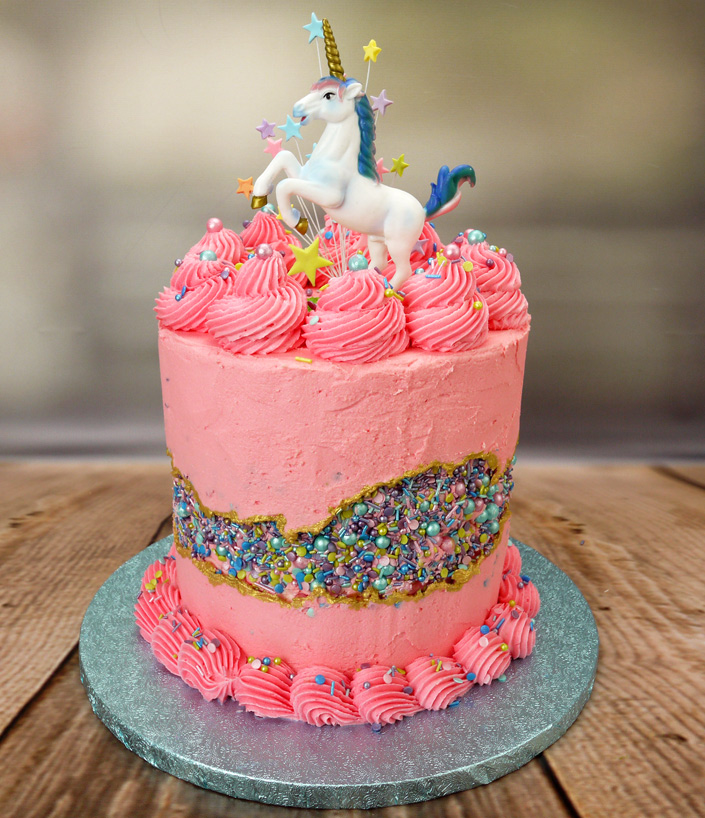
Be on trend with our simple tutorial on how to decorate a fault line cake. Follow our step-by-step guide to see how easy it is to create this dramatic effect.
.
We Used:
Edibles
1kg Sattina golden delight Madeira cake mix
1kg freshly made buttercream, see recipe below if you need a recipe
Sugarflair rose pastel paste food colouring
Sugarflair pure gold edible gold lustre glitter dust
Multi pastel icing stars spray cake topper (small), optional
.
Equipment
3 x 7″ sandwich tins, buttered and base lined
Cake leveller, optional
7″ round silver hardboard card
Spare large cake board
7″ stainless steel side scraper
Icing turntable, optional
2 x 12″ disposable piping bags
Large French open star piping tube (No.866)
Unicorn cake topper, e.g. prancing stallion unicorn
Tray with baking parchment
.
Let’s Get Started!
The Golden Delight Madeira cake mix is super easy to use, just add water, mix, divide between prepared sandwich tins and bake. We divided the mixture between 3 x 7in (18cm) round sandwich tins and baked until golden and just firm to the touch in the centre. Remove from the oven and leave the cakes to cool for about 5 minutes in the tins and then turn them out onto a rack to cool. Cut the tops of the cakes off if necessary, to level them and to make all the cakes the same height. A handy hint is to use a cake leveller to do this, otherwise use a bread knife.
It’s best to use freshly-made buttercream, so use your own recipe or follow ours below, and colour it pale pink with the rose paste colouring. The cakes are sandwiched together with a thin layer of buttercream and then stacked on the hardboard card. This hardboard card then stays under the cake whilst decorating to give it a firm base as the cake needs to be moved several times and turned on it’s side so this board gives it some extra support.
.
.
Step 1. Covering the cake in buttercream
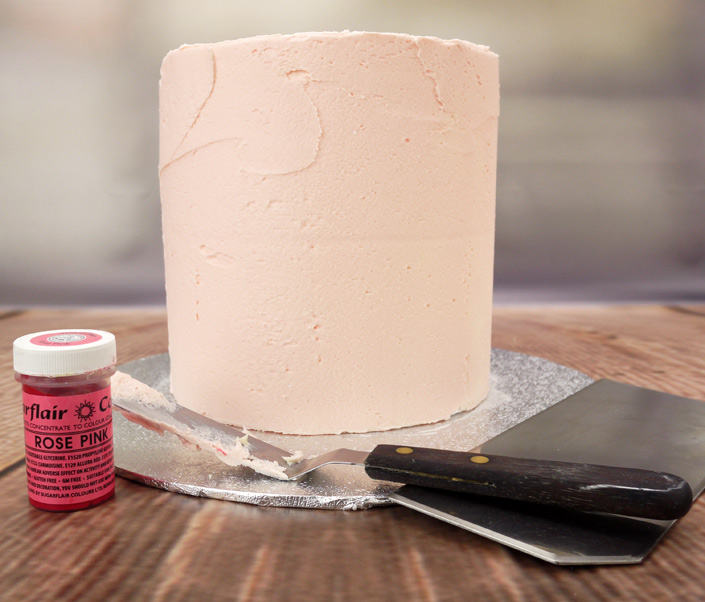
Cover the top and sides of the cake with a layer of pink buttercream, spreading it over with a palette knife and smoothing it flat with a sidescraper. You may find it easier to do this step on a turntable. Chill the cake in the freezer for about 10 minutes or in the fridge for about 30 minutes.
.
.
Step 2. Adding buttercream around the centre
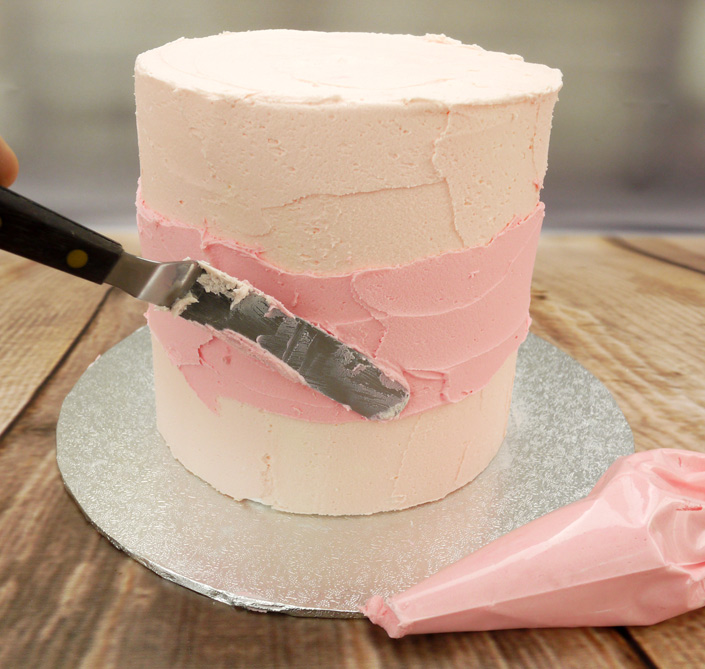
Colour the buttercream a little darker with more of the rose paste colouring. Spread some of the buttercream around the centre of the cake. The easiest way to do this is to fill a disposable piping bag and cut the end off. Pipe 3 lines around the cake, then spread them flat using a palette knife.
.
.
Step 3. Preparing the sprinkles
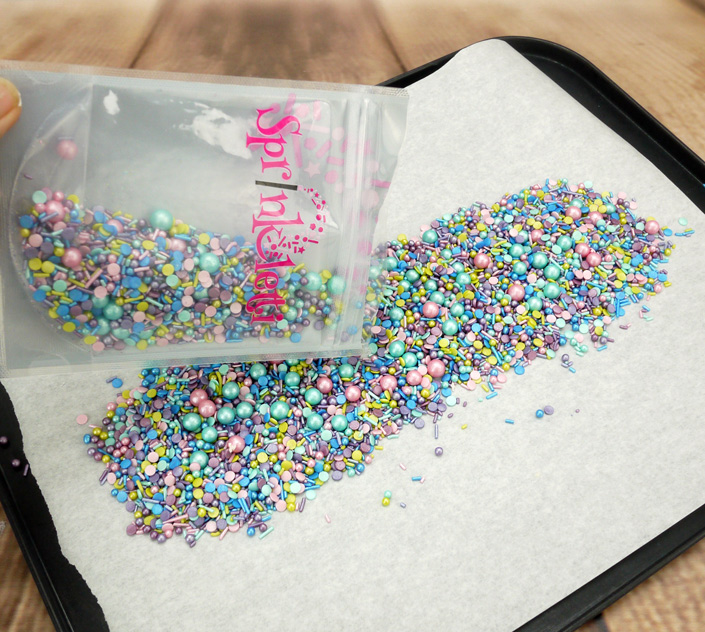
Tip the cake sprinkles onto baking parchment on a tray and spread them out in an even layer. Having them on a sheet of baking parchment will make it easy to pick them up to tip the excess back into the container after using them.
.
.
Step 4. Adding sprinkles to the cake
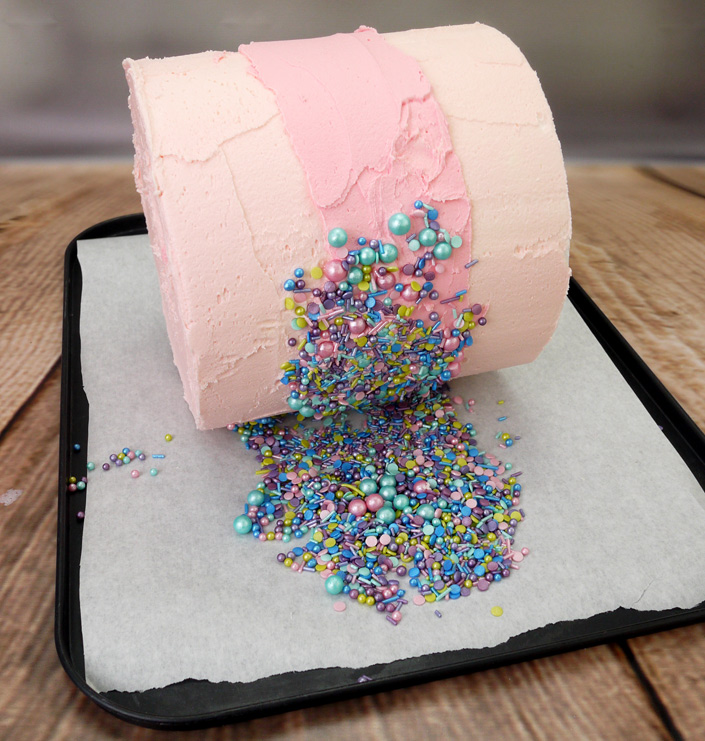
As soon as the middle band of buttercream has been spread around the cake and before it sets, turn the cake onto its side and roll it in the sprinkles to coat the band of fresh buttercream. Alternatively scoop up sprinkles in your hand and press against the band.
.
.
Step 5. Adding (more!) sprinkles
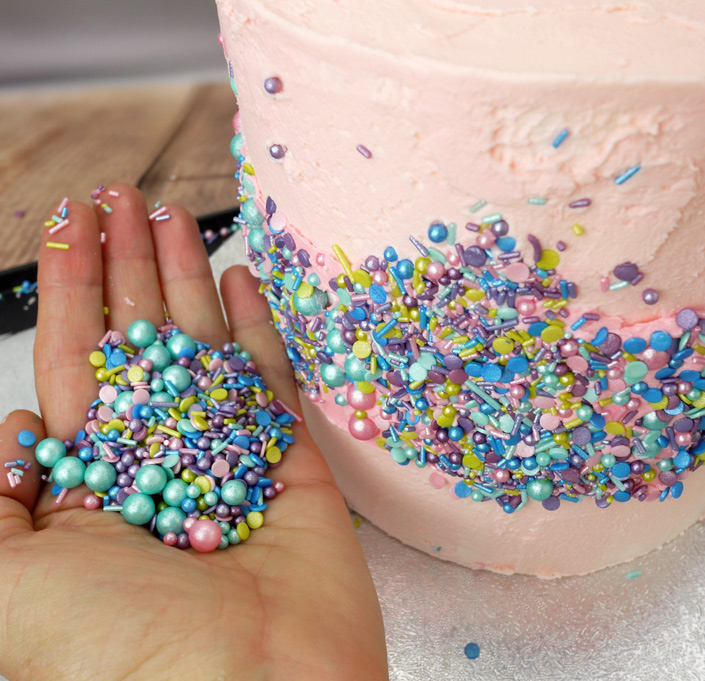
Put the cake the right way up on the spare board and if there are any sections of the band that don’t have sprinkles then scoop some up in your hand and press gently against the side of the cake to fill the gaps.
.
.
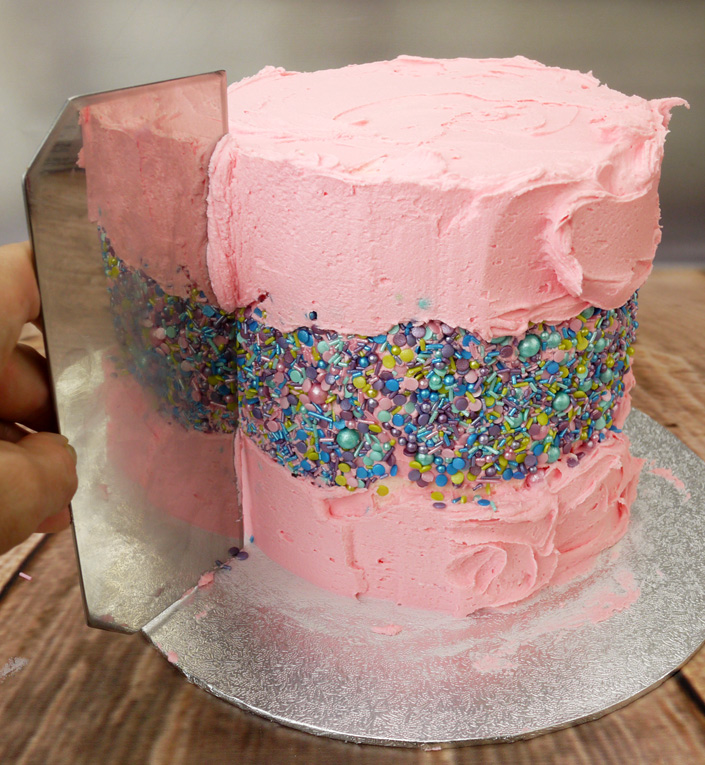
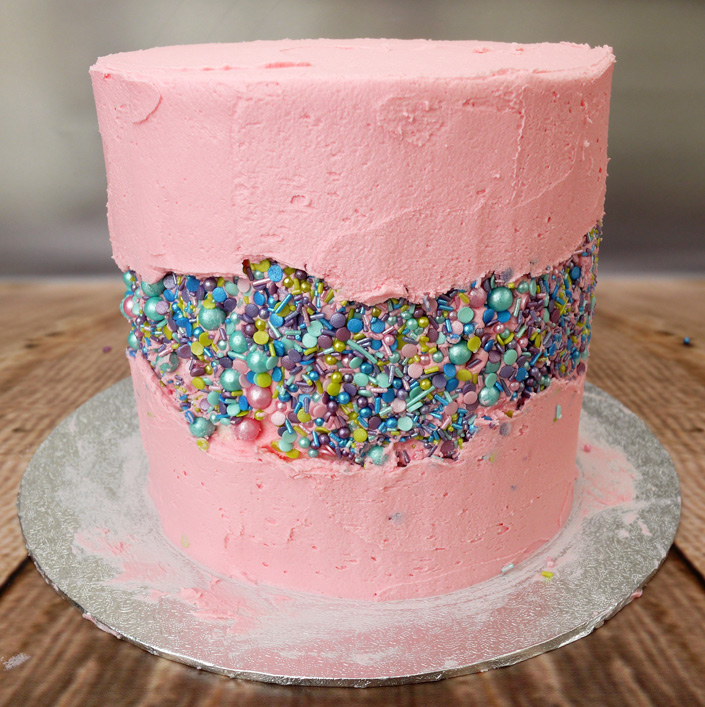
Step 6. Adding another layer of buttercream
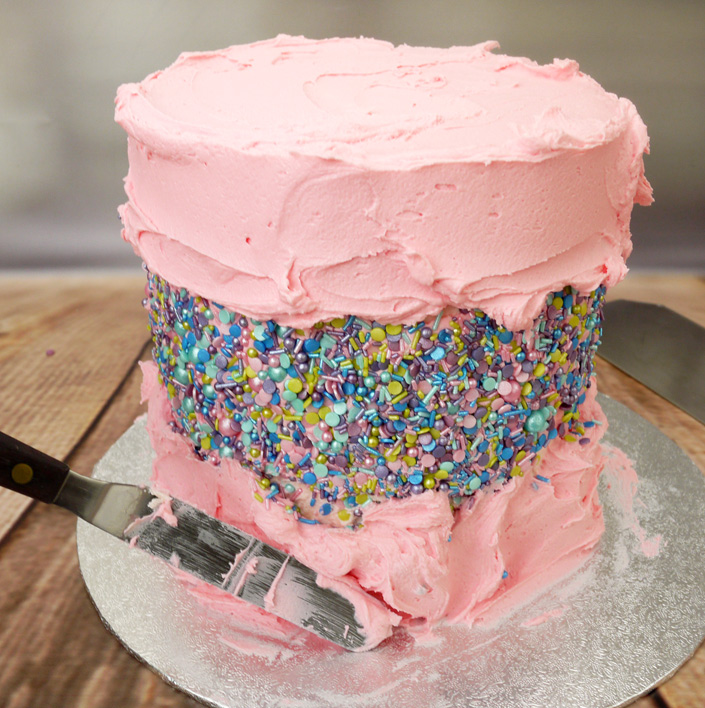
Spread some buttercream over the top of the cake, and spread some thickly around the sides, so that it protrudes beyond the sprinkles. Smooth the sides with the sidescraper, with the cake on a turntable if you have one. Smooth the top flat with a palette knife.
.
.
Step 7. Painting the edge of the fault line

Chill the cake in a freezer or fridge until the buttercream is firm. Transfer the cake to the blue board, leaving it on the thin cake card. Mix some of the gold glitter dust with rejuvenating spirit and use the paintbrush to paint over the edge of the fault line.
.
.
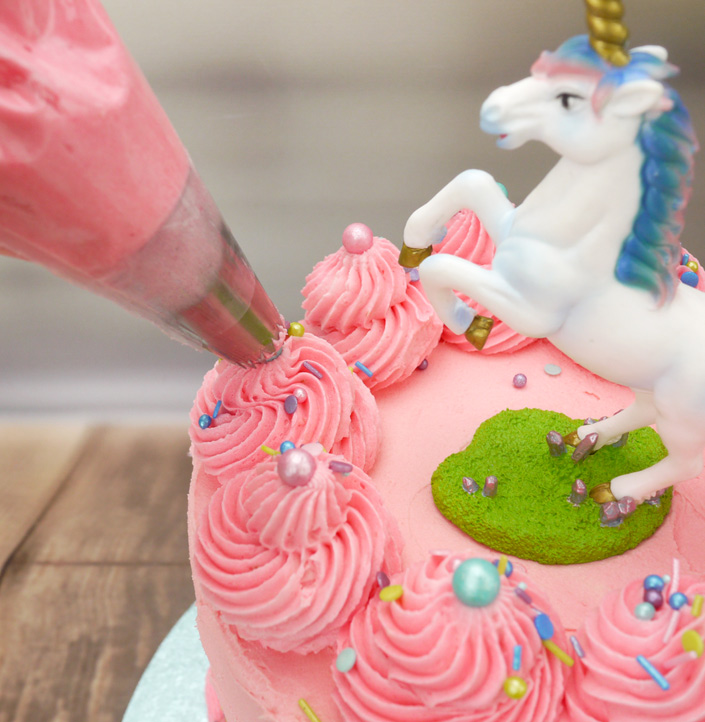
Step 8. Adding finishing touches
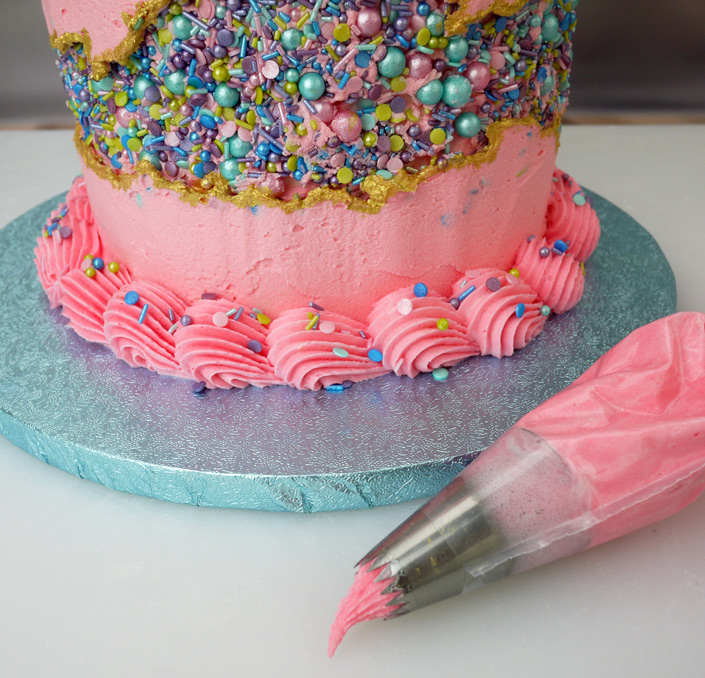
Using a piping bag fitted with the open star tube, pipe a shell design around the base of the cake and swirls around the top edge. Scatter a few extra sprinkles over the piping and place the chosen unicorn topper on top, adding an icing starburst behind the unicorn, if you choose.
.
.
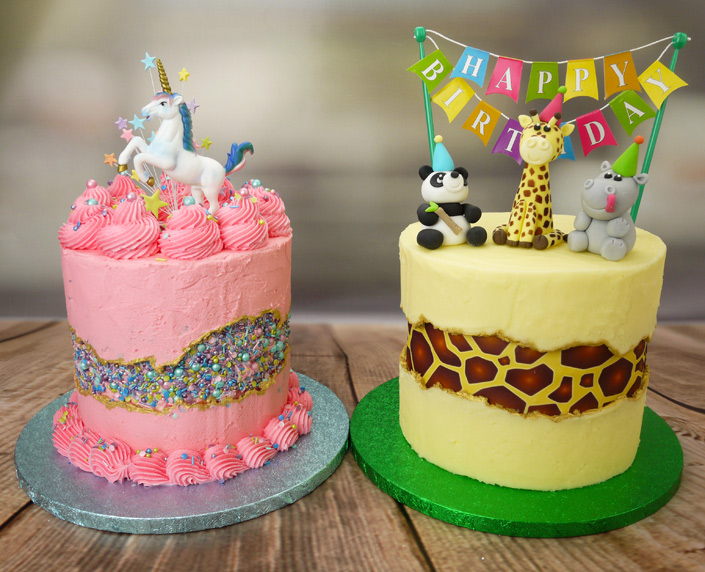
Design Variation
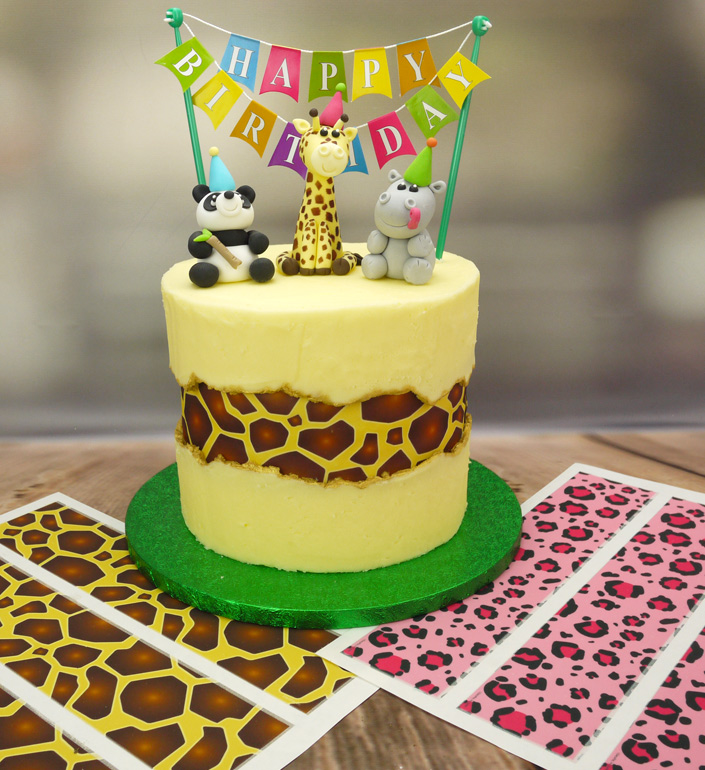
Rather than using sprinkles around the cake you can use a PhotoCake edible print ribbon (as we have done with the giraffe print cake strips on our animal birthday cake). We’ve added model jungle animals and a Happy Birthday cake topper banner to finish. But if a safari theme isn’t for you, we’ve got lots of other edible ribbons for any occasion – from floral pastel watercolours to outer space, ‘happy birthday’ balloons to a drip effect cake design. We also have an array of seasonal cake strips, so if you’re looking for Halloween cake decorations please check out our Halloween designs, suitable for children’s or adults Halloween parties.
.
.
Buttercream Recipe
We found it best to make fresh buttercream rather than a ready-made frosting. Ours was made by beating together 750g icing sugar, 375g softened unsalted butter, few drops of vanilla natural flavouring and 1tbsp boiling water. Beat it until smooth and pale in colour and use immediately. When not using, keep a sheet of cling film pressed against the surface of it so it doesn’t crust over.
.
.
Stylish Sugarpaste
If you don’t like buttercream, then look out for our project sheet on how to decorate fault line cakes using sugarpaste which will be available soon.